
Hi, thanks for signing up for the second lesson series about the Contact Area of your Channel account. We're going to start off with an intro on adding contacts, then walkthroughs on how to use the different upload options. The following lessons will have deeper explanations of these options with text and video tutorials. For right now we're going to have an introduction on uploading contacts.
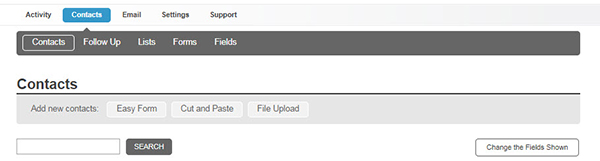
There are 3 ways to import contacts into your Contacts area. These options give you the chance to upload one contact at a time and even many by using a spreadsheet import. To see these 3 options, navigate to the Contacts area of Channel:
This is a quick way to enter a new contact one at a time. You can enter in any information you have for a connection by using the Fields you preset in your Channel account.
Here’s how you’ll use it:
First, click the Easy Form button from the Contacts Area. When you’re in there, you’ll see all of the Fields you’ve set. You can enter in an entry for every piece of information you have for that contact. Remember, this is for uploading one contact at a time. Also, check the “Optional Opt-in Override” button if you have permission from that contact to send your bulk email information to them (email newsletters).
The Cut and Paste version is a good solution if you need to upload a few contacts at once, or if you have a comma separated text file. This is a somewhat advanced way to upload new connections. To use this option, you’ll have to make sure that each field for every contact is entered in the same order. Let’s say you separated each first name and last name with a comma. If you forget to separate just one first name and last name, that contact’s information will not import the same way as all of your other contacts. It’s important to keep each field in order with this option.
The most powerful option is the File Upload option. This lets you take a “batch”, or multiple contacts, and upload them all at once. There are a few things to know to make this process go smooth.
Here are some things you’ll need to know before using the File Upload option:
Before you choose to “Upload” your new connections, you’ll see the two below options. The first is “Optional Opt-In Override” and the second is “Add only if email address is not already in all contacts.” Both of these options are important to having a successful upload. Here’s more information on both of these:
Any time someone signs up through one of your promotions through Review, Offer, Giveaway or a contact form they will automatically be pulled into your Contacts Area. It works much like any of these upload methods. When you’re given permission to send a contact bulk email you can see that on the far right where it says if they are Subscribed or Unsubscribed.
But any of the contacts you have in the Contacts area can still be sent a Single Email (envelope icon on the right), and you can also keep updating their information in their notes. For more on these take a look at the Contacts Area Knowledge Base article. Every contact is extremely valuable and any time you have the ability to communicate is an opportunity to open a new line of communication with a potential customer.


